Simply select the plugin icon  from the tool's panel you have put it (see installation notes) and place your initial Arch on your drawing (usually in a wall).
Note: you can control wall insertion in the usual way, setting Z value and wall offset (+/-).
The Arch 2D representation will reflect the offset value and in 3D views you will see the elevation from the ground (Z=0).
When the opening is a "window" (Z>0), you can check the Close Base parameter ON in order to create a sill when the opening is adorned with bricks or trims (see Customising the aspect, here below).
Choosing the type:
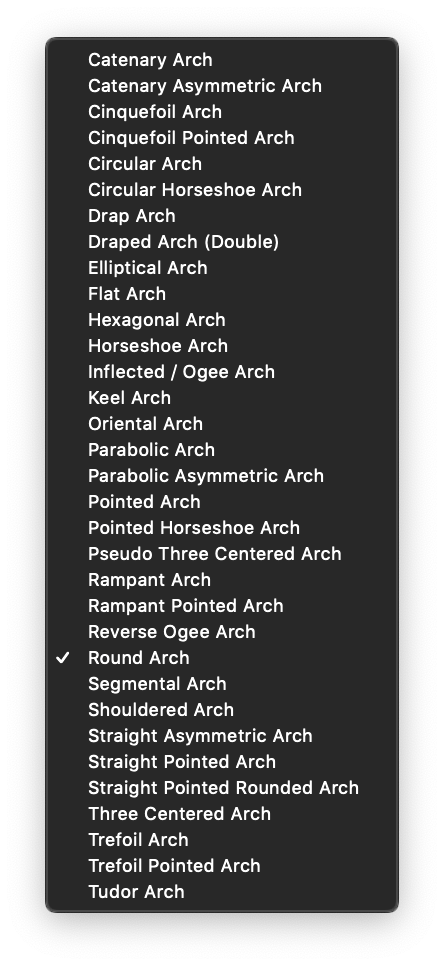
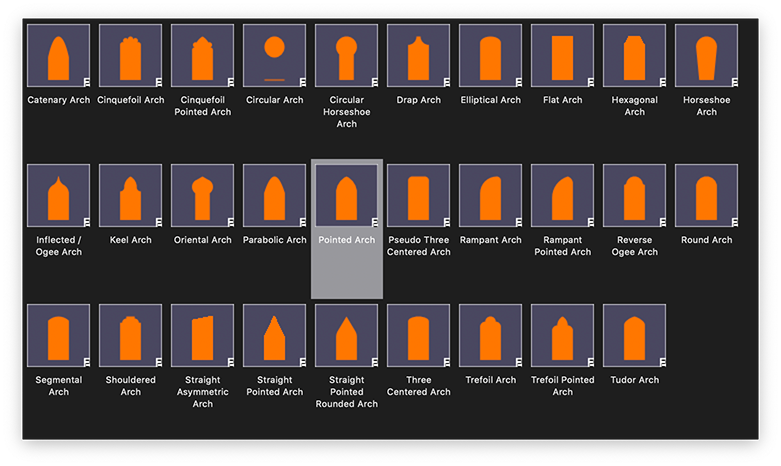
32 types of arches are possible, see interactive representations here below.
You can choose the type directly from the popup menu in the OIP, taht is, as you can see, very crowded.
To facilitate this task, click on the "instruction" button, in the OIP.
The following dialog appears
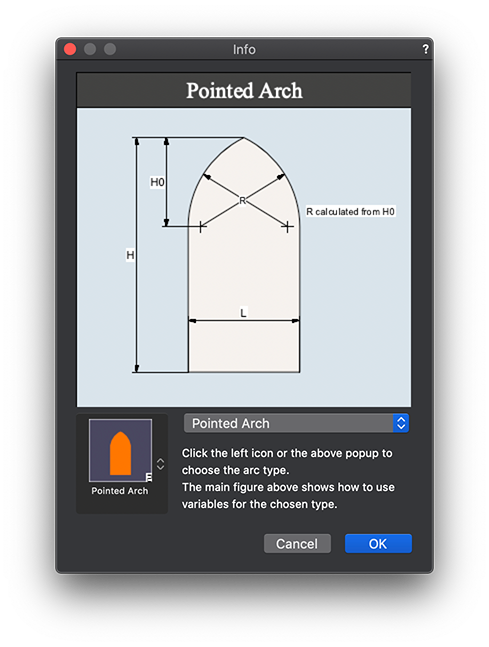
The main image shows the parameters used for the selected type
Below, you have the pop up menu with all the types and, at left, an icon popup where to choose visually the type,
Of course, the main figure changes accordingly with the selected arch.
Once you are ready, click OK and complete the fields to shape the arch.
Note: it may happen that changing between types, or even setting certain values, you could get a geometrically impossible arch. The program is able to catch any incongruent value, send a warning and, at the same time, set the appropriate values for the arch type.
Each type has controls for height, width and depth (if not in a wall) plus other parameters (L0, H0, R) that are activated when needed to control that particular type.
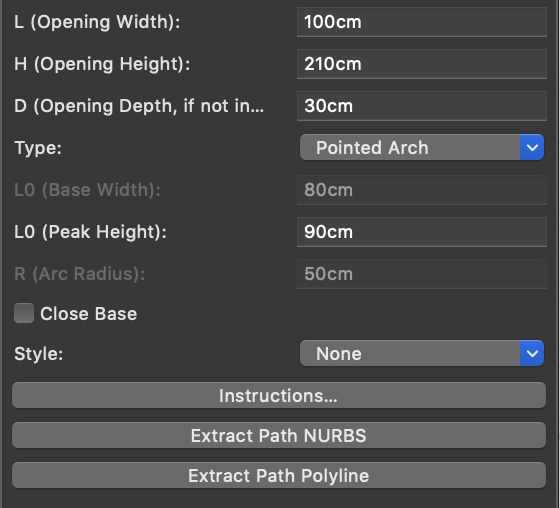
Customising the aspect:
In the
"style" popup you can choose the decoration of your arch.
Currently there are two options (other than the
None option).
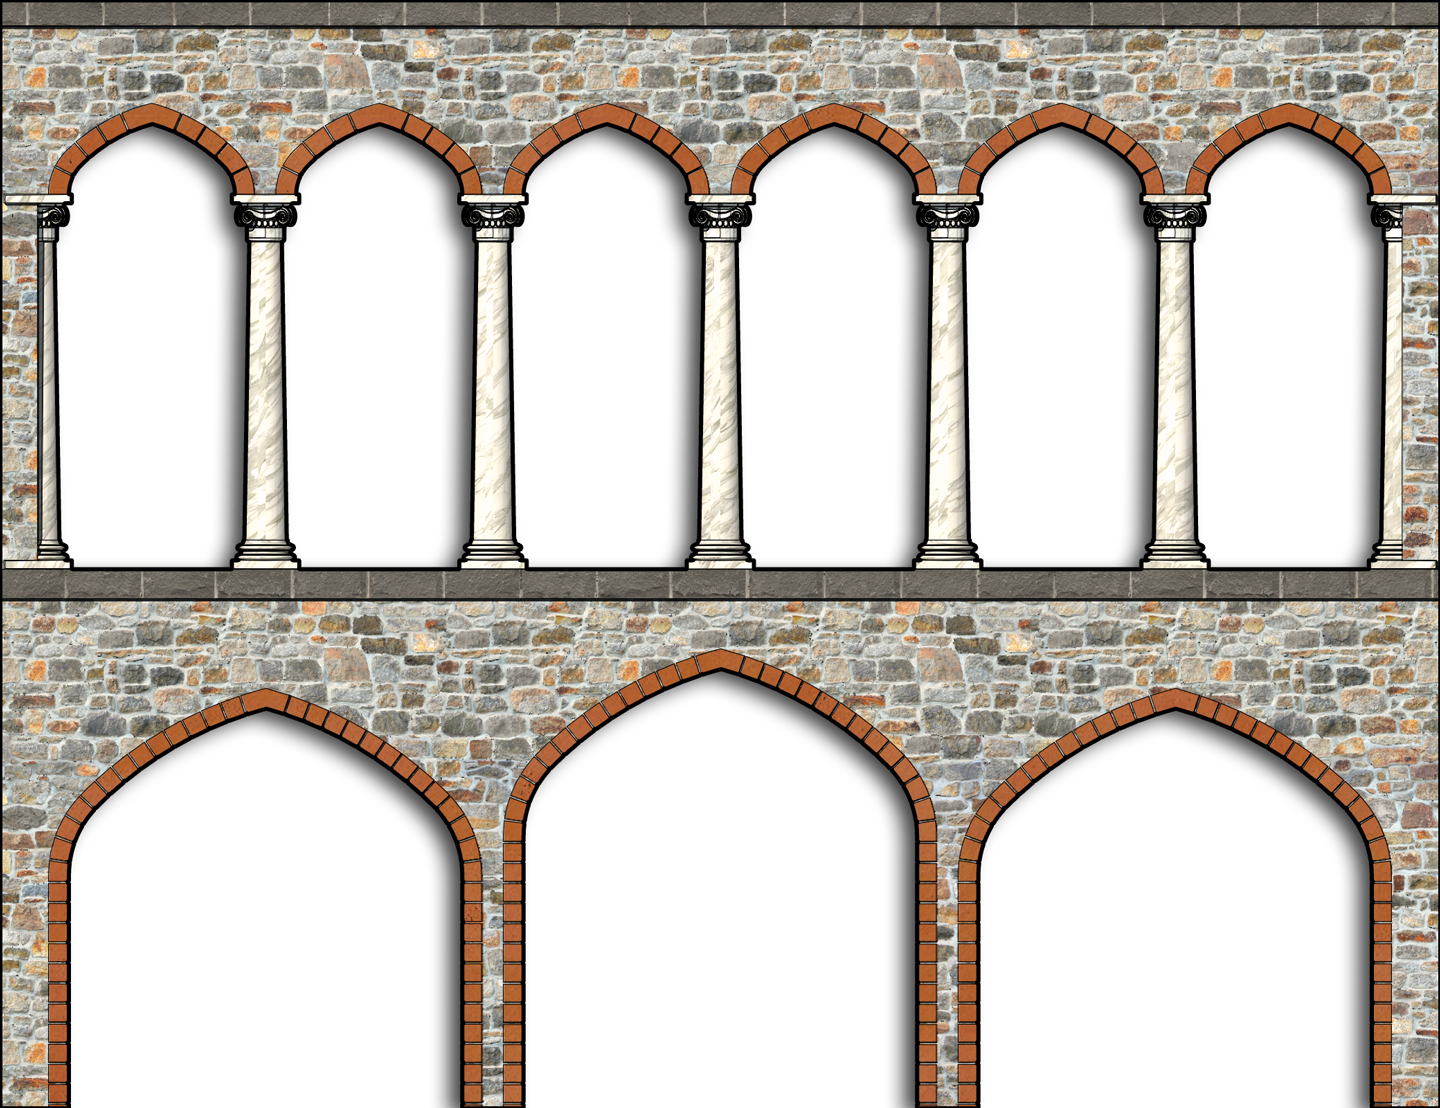
Bricks: let you surround your arch with bricks (or stones), controlled by the various parameters that appears consequently:
- Smooth corner checkbox
- Keystone checkbox
- Brick height
- Brick width
- Bricks interspace
- Bricks ledge
- Bricks start offset
Trims: let you surround your arch with a solid corniche, controlled by the following parameters:
- Smooth corner checkbox
- Inner trim
- Trim width
- Trim thickness
Note: both Bricks and Trims styles add solid objects to the opening, so you can choose a class or a material (whose controls are enabled when you select a style) to control the decoration attributes.