Trim Markers
With the command Trim signs control… it is possible to take advantage of the optical reading markers to be used in the cutters Fotoba® model DIGITRIM.
From the FOTOBA® site: Digitrim is a recent innovation introduced for digital print finishing. Its main feature is the is ability to sense cut marks placed between multiple digital images, printed or exposed simultaneously on single pages or rolls of digital media. Paper alignment is automatically set by cutmarks. You only have to put cut marks around your images.
A short video shows the usage of cut marks in a cutter Fotoba® DIGITRIM
Premise:
The Fotoba® DIGITRIM cutters work in this way:
- The sheet is printed with the Fotoba® markers and is introduced inside the cutter, for a first passage, in the same way it got out from the printer.
- The cutter makes the sheet advance, "reads" the first encountered marker and makes a double cut (before and after the marker). The cut crosses the whole sheet, causing the detach of the portion downstream of the marker.
- Automatically, the cutter makes the sheet advance again, reads the other markers and continues with the remaining cuts.
- Subsequently, the portions obtained must be reintroduced by an operator, one by one, in the machine, this time with the remaining markers (laterals) parallel to the cutting direction; in this way we complete the cuts all around each image.
The cutter Fotoba® DIGITRIM cuts crossing the whole sheet, for this reason the markers are specially for images aligned in rows and columns of the same size (or reproductions of the same image).
It is therefore NOT possible to take advantage of a Fotoba® DIGITRIM cutter for images of different heights or not aligned.
Command usage:
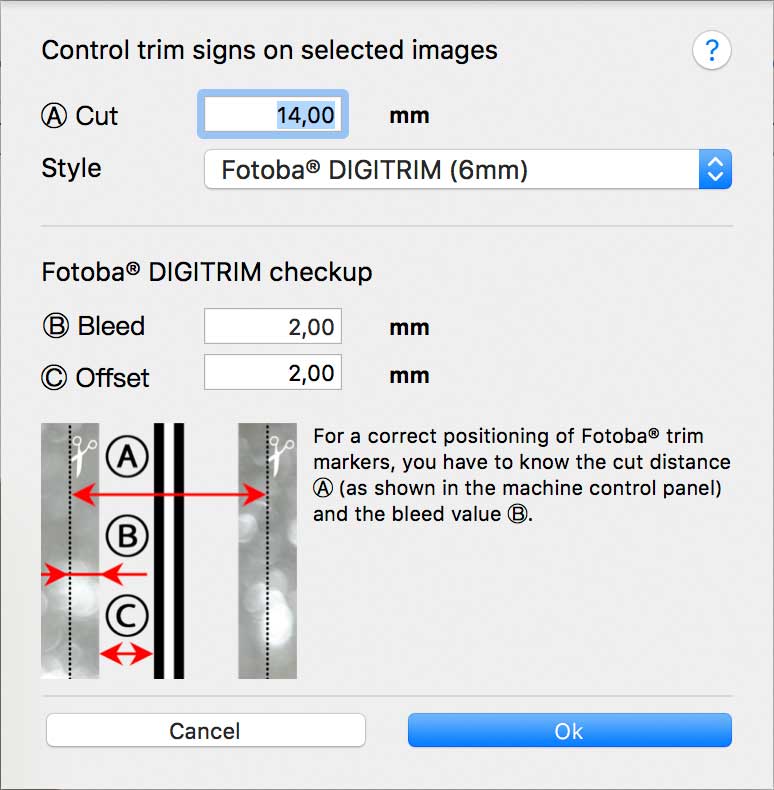
From the menu Tools->Control trim signs…, or from the toolbar [customizable], icon ![]() you get the dialog (figure 1) where is possible set up the markers for the Fotoba® Digitrim cutters.
you get the dialog (figure 1) where is possible set up the markers for the Fotoba® Digitrim cutters.
Three different thicknesses were made available for the Fotoba® markers, in this way you can use them in the more appropriate situations:

The values in mm showed in the menu refers to the thickness of the line black/white/black "═" that constitutes the marker itself, recognized by the Fotoba® cutters in their Digitrim models.
The 6 mm value is the one suggested by Fotoba®, since it is recognized without errors by the machine, even with prints of middle / low quality.
However we propose also the 3 mm and 1.5 mm values that,if used with a medium / high quality print, are recognized with sufficient certainty by the machine and allows a more efficient paper usage.
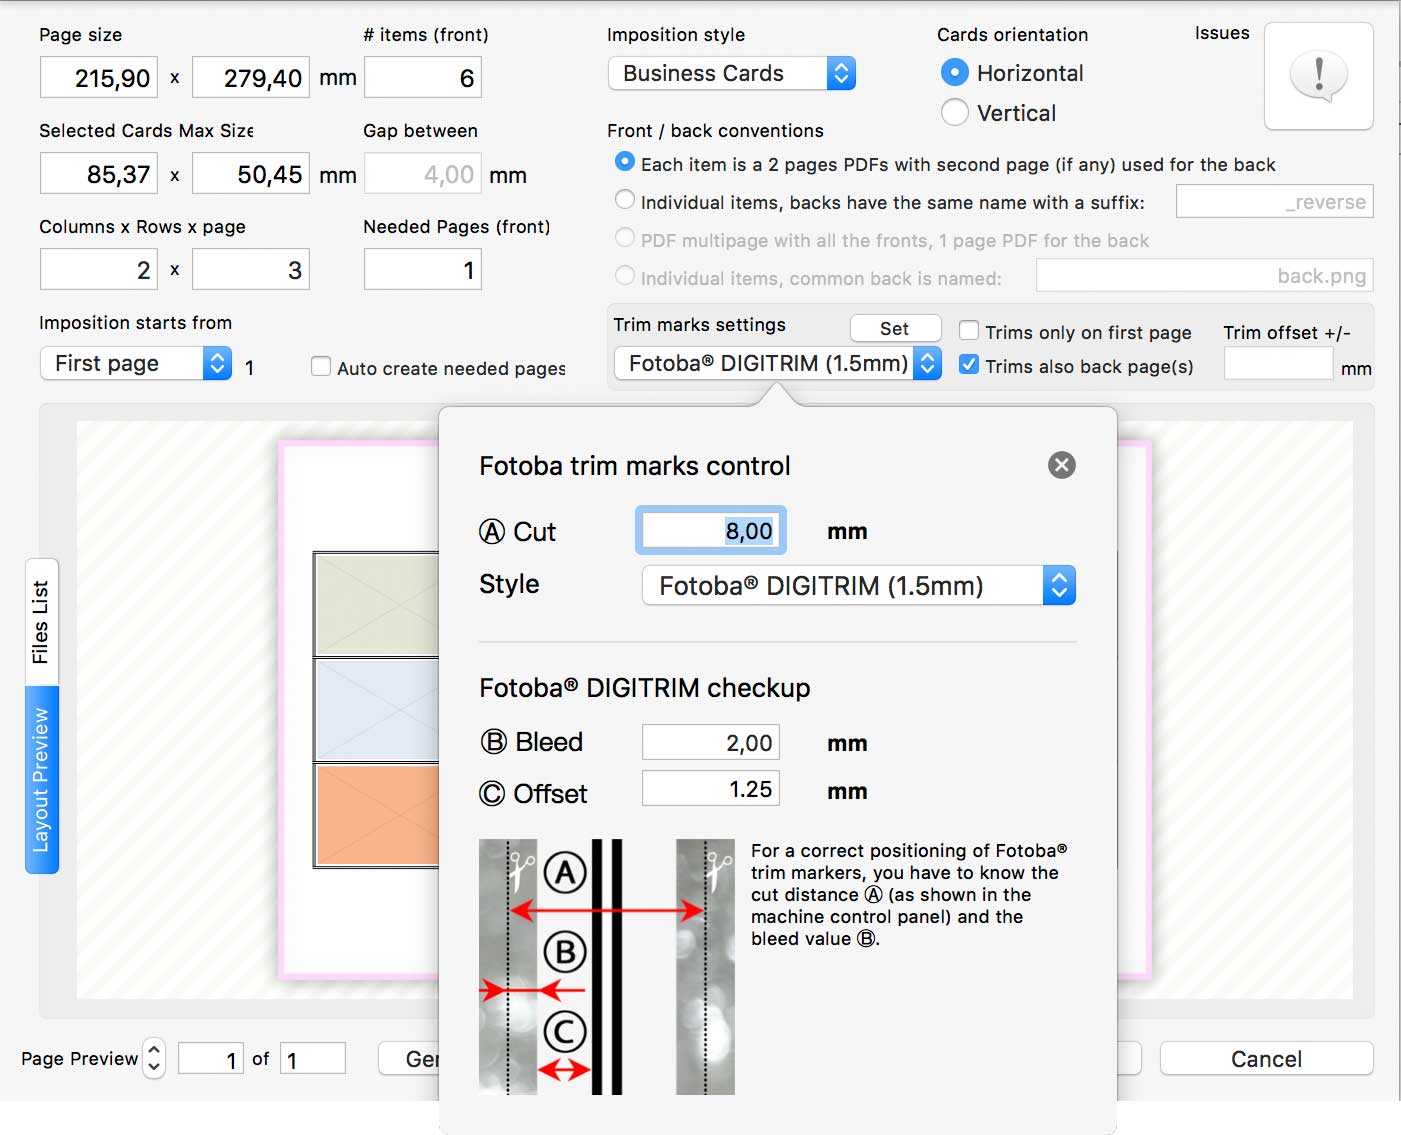
Ⓐ = Amplitude of cut: this value must be the same that we are going to set in the cutter (via the cutter control panel) and means the distance between the two cuts that a single marker commands.
Ⓑ = Bleed: we are going to set here the part of the image to trim out.
Ⓒ = Offset: this value[*] is a calculated one, based on choices made above for Ⓐ, Ⓑ together with the thickness of the marker chosen in the menu.
Once these values are set, click on the button "OK" to confirm. As result, we will see the markers disposed on the perimeter (in case an image was missing the trim signs) of each selected image or disposed only on sides already equipped with trim signs.
[*] The value Ⓒ corresponds to the trim Offset ± already present for so long in FitPlot (see info panel extra).
Figure 2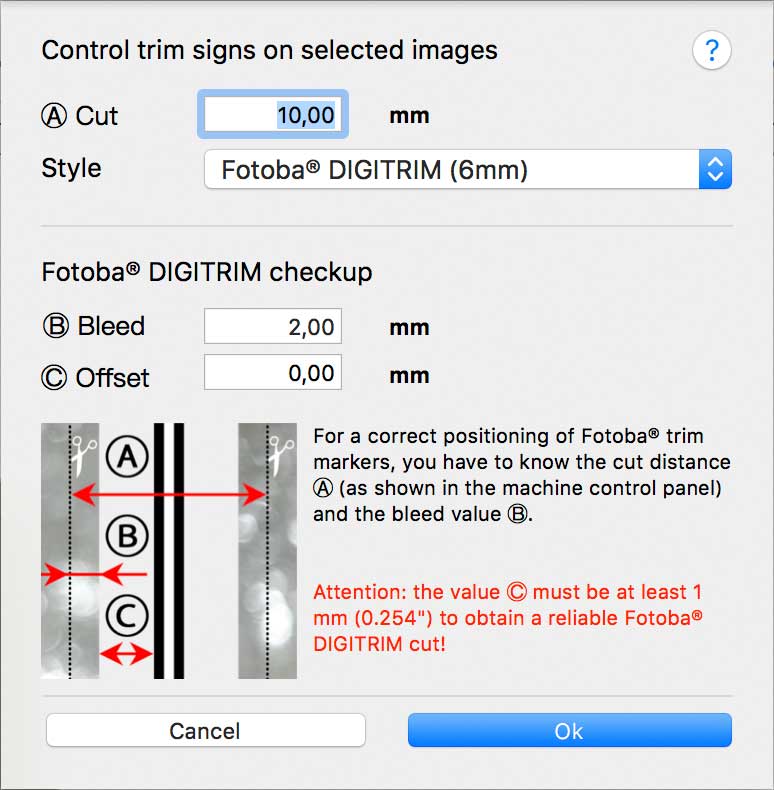
Note: the value Ⓒ must be at least 1mm, else the cutter could not work correctly. In such occurrence, a warning message will be shown in the dialog itself, see figure 2.
Image's replications:
As anticipated in the premise, the use of printed marks in the Fotoba® Digitrim is particularly suitable for replicas of the same image.
There is already, in FitPlot, a command for image duplications in rows and columns, called Serial Duplication.
Before to launch this command, we apply the desired Fotoba® markers to the image to be replicated.
Subsequently, with the image still selected, we launch the duplication command (menu Edit -> Custom Duplication…). A dialog will show up. Here we'll have to insert the number of duplicates (horizontal and vertical).
Note: the horizontal and vertical distances (A and B in the dialog) corresponds to the bounds of the selected image, taking into the right account any Fotoba® marker attributed.
Once ready, we confirm with the "OK" button and the duplicates are generated, with all their markers perfectly disposed.

Notes about packing:
The packing (nesting) considers the images bounds for its algorithm.
We can profitably utilize the packing of images equipped with Fotoba® Digitrim markers, provided they comply with the following clauses:
- All images must have the same size
- All images must have the same orientation (portrait or landscape)
- The markers chosen thickness must be the same for all images
- Moreover, inside the packing dialog, do not allow the 90° rotation and set the Gap = 0
Business cards imposition:
The command Imposition -> Business Cards… has been updated to take into account the new markers for the Fotoba® Digitrim cutters.
It is sufficient to choose (in the imposition dialog) the desired markers and, with a dialog similar to the one showed before at Command usage section, type the desired values for Ⓐ and Ⓑ, to obtain, in the end, a layout complete with Fotoba® markers, ready to print.