A tool that Vectorworks® was missing is now available and simple to use!
Distortion 3D plugin by Paolo Marcuccetti ©2021-2026
Get free distortion (perspective, skew etc.) of 2D objects directly in Vectorworks®
Get free distortion (perspective, skew etc.) of 2D objects directly in Vectorworks®
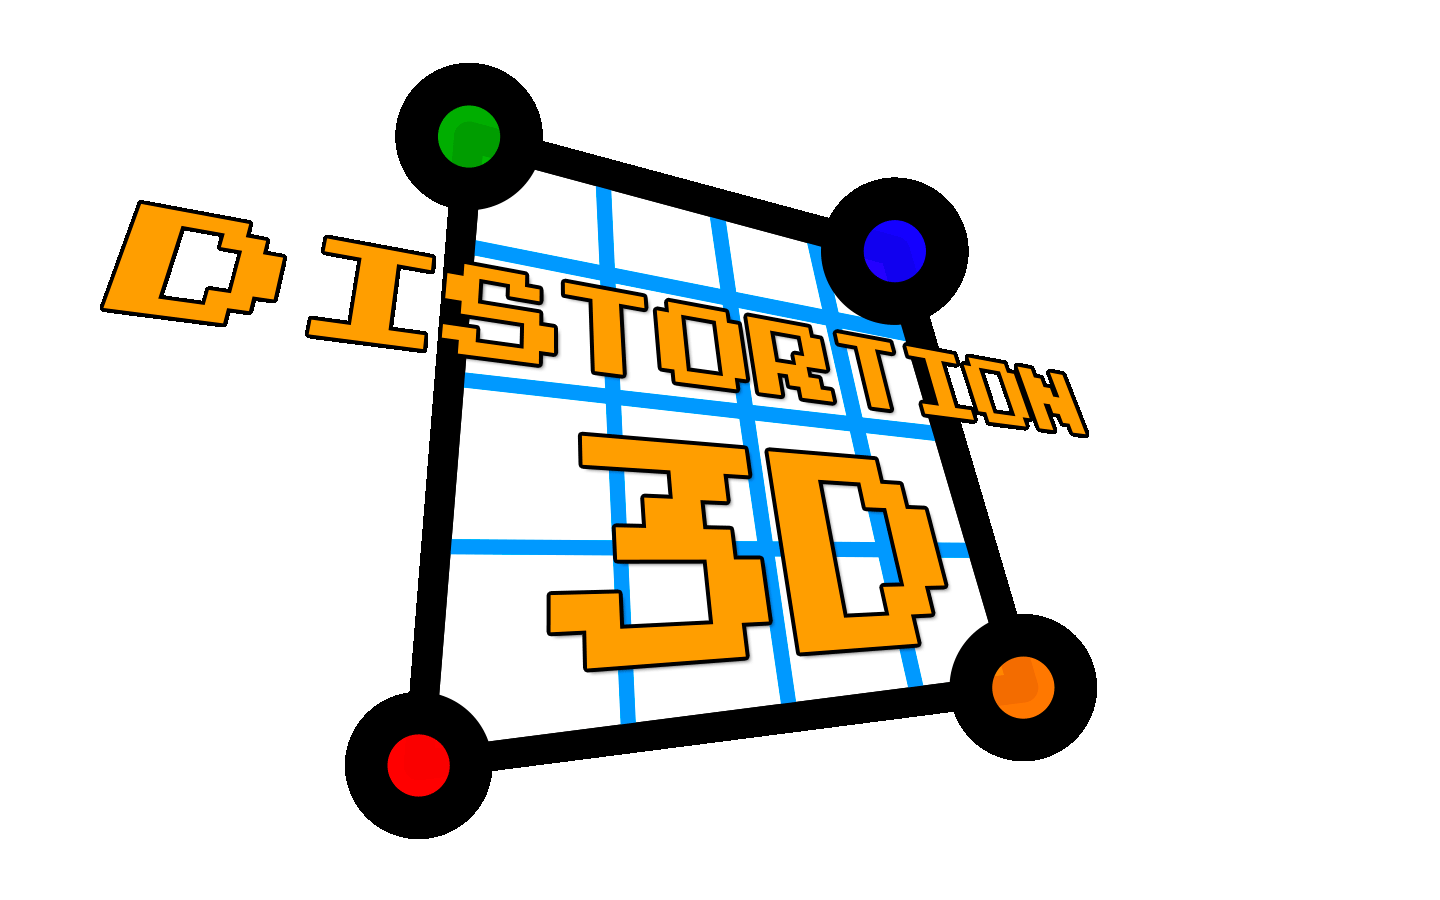
With this plugin you can freely distort1 2D objects such as points, lines, rects, rounded rects, ellipses, arcs, polygons and polylines, even if grouped.
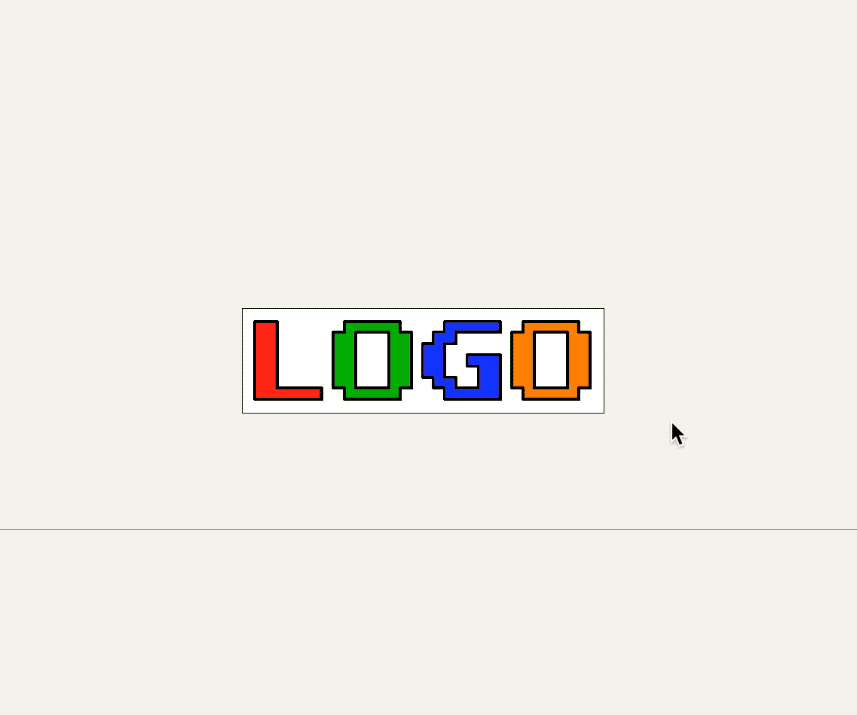
You can, for example, convert a text logo into polylines (with the known Vectorworks® command) then apply a distortion to it to see as could it appear in perspective.
(1) Note:
A "distortion" is meant, technically speaking, a homography, that is a transformation between two planes.
Not all objects of your drawing can be distorted with this plugin.
Currently the eligible types are:
Of course you can convert more complex objects (symbols, PIOs, etc.) to eligible types then produce the distortion.
(2) Note:
A special algorithm converts (when needed) curves into beziers allowing a more precise distortion and maintaining, at the same time, the smoothness of the shapes.
Of course, elements distorted will alter the initial type (a circle becomes a polyline, for example), so it's up to you to duplicate the objects and preserve a copy of their initial state before to proceed.
Note: You cannot distort bitmap images with this plugin, but you can do it with the PlumbBob plugin
 to "multiple" objects (double arrows).
Select the
to "multiple" objects (double arrows).
Select the 
By default the placed object is a square 100x100cm but you can change it in advance, changing some parameters in the options panel (in the Vectorworks® tool bar)
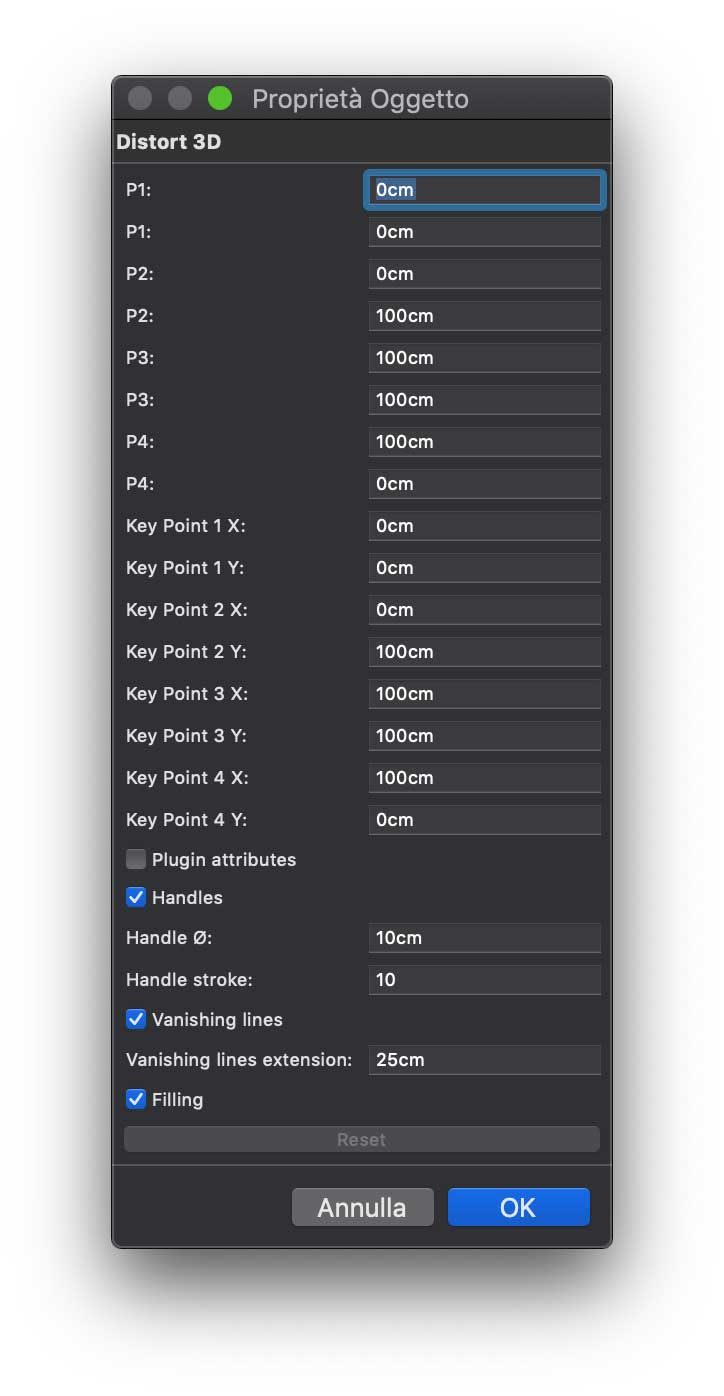
Be careful: if you edit the P1…P4 and key Point 1…key Point 4, be careful to perfectly couple P(1…4) with key Point (1…4) x and y values respectively.
Points and key points (1 to 4) must be initially equals (respectively), since the transformation is calculated by their difference once you move one of the coloured handles!
You can change also the plugin appearance in the OIP panel…
Just set on the Plugin attributes check box to get the other settings visible.
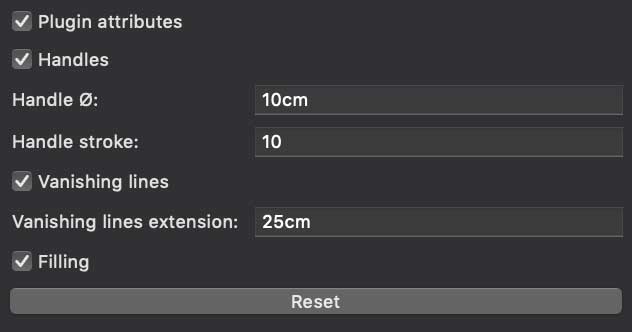
The Reset button returns the plugin object to its initial 100x100cm square form
Once the Distort 3D object is placed on your drawing you can move to its starting place.
Usually it should bound the objects to transform, so you may prepare in advance a rectangle that contains the objects to distort then (important!) with all the objects deselected, drag each plugin handle to its initial place.
When ready, drag a selection box including the plugin and the objects to distort, then start dragging one handle at a time. The result is immediate!
If you want to exactly wrap the objects to a given shape (from an initial square / rectangle), just draw the final shape or place its 4 vertex locuses then move / snap the handles there, see the movies below…
Unpack the appropriate downloaded zip file (2020 or 2021 version)
You will get a single element:
Here the official instructions (from help.vectorworks.net) for editing the workspaces:
And here instructions for modifying tool palettes:
I'm moving my plugins to PayHip, as Gumroad no longer offers PayPal as a payment option.
The plugins currently available on Gumroad will still be available for purchase with a credit card on my Gumroad® shop page.